
JWT Authentication: I Locked Myself Out of My Own API and Learned How Tokens Work
I built my first Express API and felt good about it. Routes worked, data came back, everything looked right. Then a friend asked "so how do you stop random people from deleting stuff?" and I realized the entire thing was wide open. Anyone with the URL could hit any endpoint. There was no login, no identity check, nothing. It was a public buffet where anyone could walk into the kitchen.
That is how I ended up learning about authentication. Not from a textbook or a course outline, but from the realization that my API had no front door.
What authentication actually means
Authentication is the server asking "who are you?" before doing anything. When you log into Instagram, you type your email and password. Instagram checks those against what it has stored. If they match, you are in. If they do not, you are not. That is authentication.
There is a related concept called authorization, which is "okay I know who you are, but are you allowed to do this?" A regular user can view posts. An admin can delete them. Authentication comes first. Authorization comes after. This post is about the first one.
The reason authentication matters for APIs specifically is that APIs do not have a login screen sitting in front of them. A browser shows you a form. An API just accepts HTTP requests from anywhere. Without authentication, every endpoint is open to anyone who knows the URL. Your delete route, your admin panel, your user data. All of it.
The old way: sessions
Before tokens became popular, most web apps used sessions. The flow worked like this: you log in, the server creates a session object and stores it somewhere (usually in memory or a database), and it sends you back a session ID as a cookie. Every time your browser makes a request, the cookie goes along automatically, and the server looks up the session to figure out who you are.
This works fine until you have multiple servers. If server A created the session and your next request hits server B, server B has no idea who you are because the session data lives on server A. You can fix this with a shared session store like Redis, but now you have another piece of infrastructure to manage.
Sessions are stateful. The server has to remember something about you between requests. That is the part that gets complicated at scale.
The stateless idea
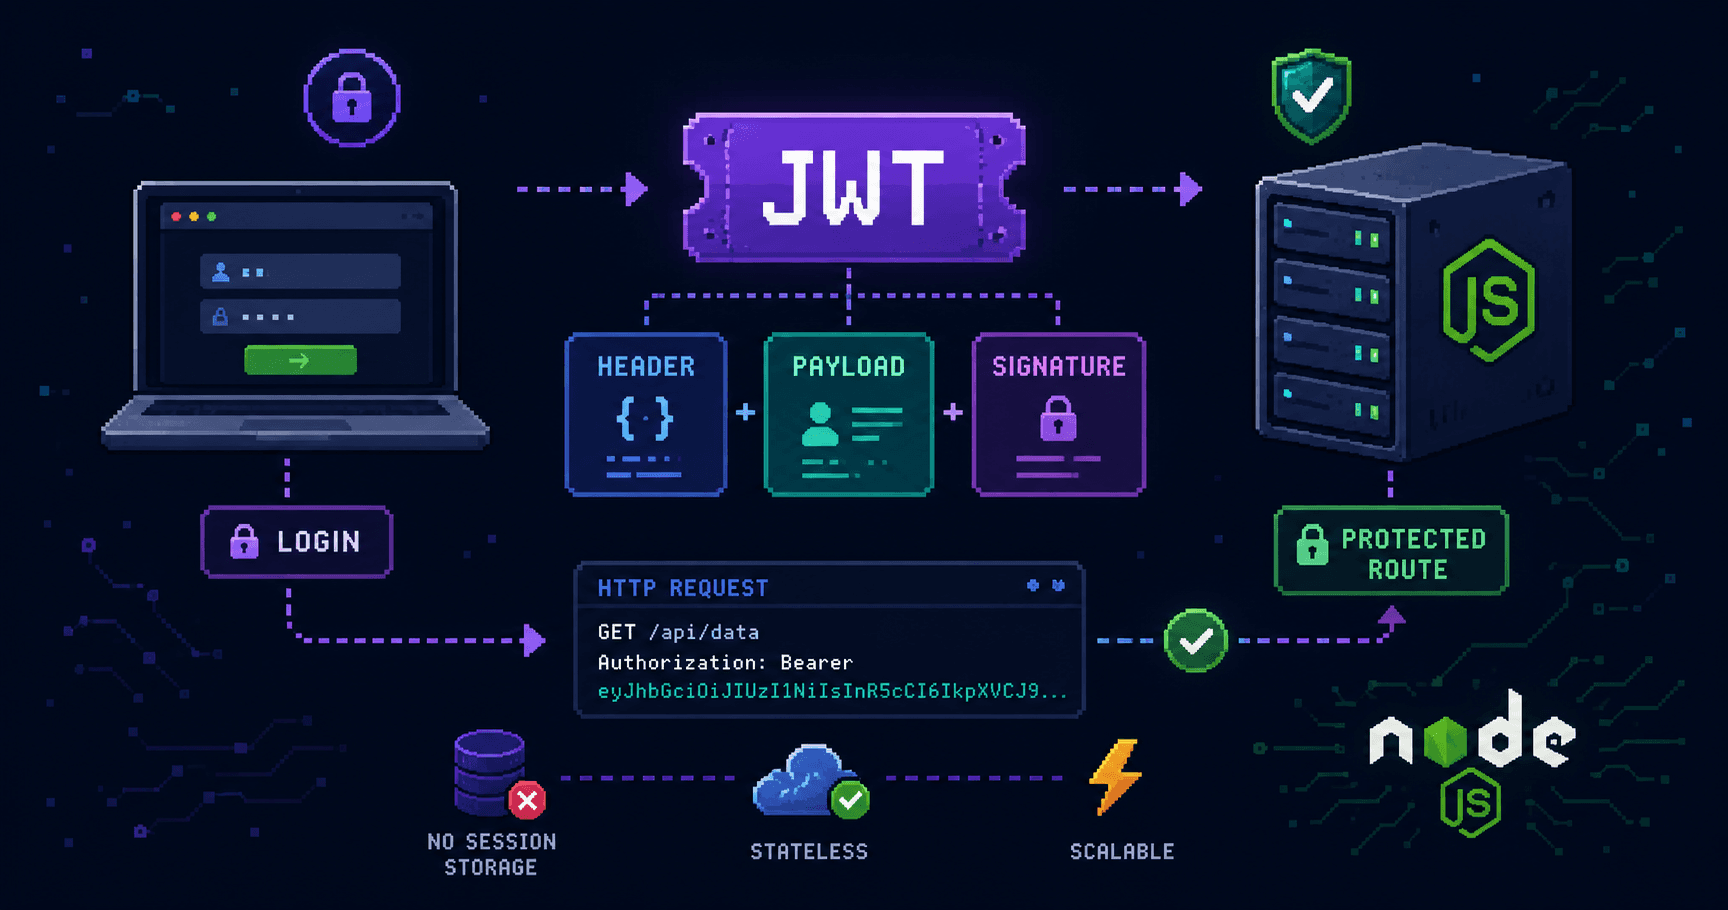
JWTs take a different approach. Instead of the server remembering who you are, the server gives you a token after login that contains your identity information. On every request, you send the token back. The server reads the token, verifies it has not been tampered with, and knows who you are. No lookup needed. No session store. No shared state between servers.
The server does not remember anything. It just reads what is in the token and checks the signature. Stateless.
This is the core idea behind token-based authentication, and it is why JWTs became the default for APIs, single-page applications, and mobile apps. The server does less work per request, and scaling horizontally is simpler because any server can verify any token independently.
What a JWT actually looks like
JWT stands for JSON Web Token. When you see one, it looks like three chunks of gibberish separated by dots:
eyJhbGciOiJIUzI1NiIsInR5cCI6IkpXVCJ9.eyJ1c2VySWQiOiI2NWFiYzEyMyIsInJvbGUiOiJjdXN0b21lciIsImlhdCI6MTcwMDAwMDAwMCwiZXhwIjoxNzAwMDg2NDAwfQ.SflKxwRJSMeKKF2QT4fwpMeJf36POk6yJV_adQssw5c
Three parts. Each separated by a period. Each part is base64-encoded, which means it is not encrypted. Anyone can decode it. I will say that again because it surprised me: JWTs are not encrypted by default. They are encoded. There is a big difference, and I will get to why that matters.
The three parts
Header
The first chunk is the header. Decode it and you get:
{
  "alg": "HS256",
  "typ": "JWT"
}
Two fields. alg is the algorithm used to create the signature (more on that in a second). typ says it is a JWT. That is it. The header is boring. You will almost never think about it.
Payload
The second chunk is the payload. This is where the actual information lives:
{
  "userId": "65abc123",
  "role": "customer",
  "iat": 1700000000,
  "exp": 1700086400
}
userId and role are claims you put there yourself when creating the token. iat is "issued at," a Unix timestamp of when the token was created. exp is the expiration time. After that timestamp, the token is invalid.
You can put whatever you want in the payload. The user's name, their email, their permissions. But remember what I said about encoding versus encryption. Anyone who gets this token can decode the payload and read it. Do not put passwords, credit card numbers, or anything sensitive in here. Think of it like writing something on a postcard. Anyone handling it can read it. The signature just proves nobody changed the text.
Signature
The third chunk is the signature, and this is the part that actually matters for security. The server takes the header, the payload, and a secret key that only the server knows, and runs them through the algorithm specified in the header:
HMACSHA256(
  base64UrlEncode(header) + "." + base64UrlEncode(payload),
  your-secret-key
)
The output is the signature. When the server receives a token later, it repeats this exact calculation using the header and payload from the token plus its own secret key. If the result matches the signature in the token, the data has not been tampered with. If someone changed the role from customer to admin in the payload, the signature would not match, and the server would reject the token.
The secret key is the entire security model. If someone gets your secret key, they can forge valid tokens for any user. Keep it in an environment variable, never commit it to Git, and make it long and random.

The login flow
Here is what happens when a user logs in and then accesses a protected route. I am going to walk through every step because seeing the full picture once makes the individual pieces make more sense.

Step by step:
The client sends the email and password to a login endpoint.
The server looks up the user in the database and compares the password using bcrypt (never compare plain text, always hash).
If the password matches, the server creates a JWT containing the user's ID, role, and an expiration time.
The server sends the token back to the client.
The client stores the token (usually in localStorage or memory, depending on the app).
On every subsequent request, the client includes the token in the
Authorizationheader.The server reads the token, verifies the signature, checks expiration, and either processes the request or rejects it.
No session stored anywhere. No database lookup on every request to check who is logged in. The token itself carries the identity.
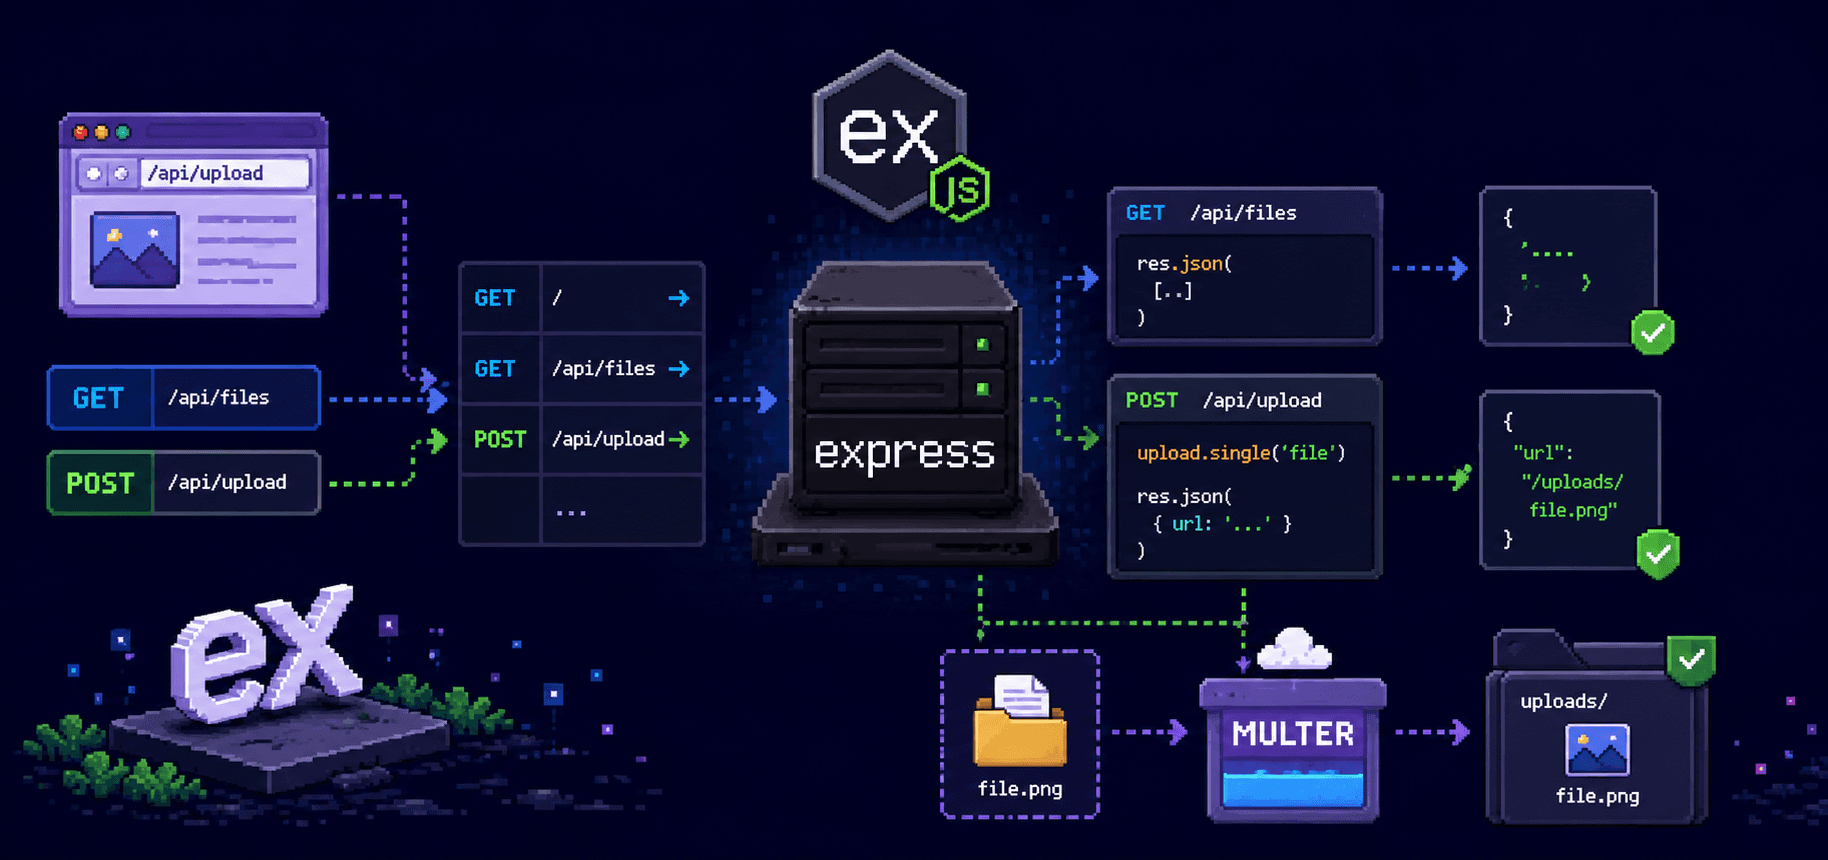
Building it
Enough theory. Let me show you the actual code, starting from an empty Express app with a MongoDB connection (covered in Part 5 of this series).
Install what you need
npm install express mongoose dotenv bcryptjs jsonwebtoken
bcryptjs is for hashing passwords. jsonwebtoken is the library that creates and verifies JWTs.
The User model
This is a trimmed version of the model from the Mongoose post. Password hashing happens in a pre-save hook so you never accidentally store a plain text password.
// models/User.js
const { Schema, model } = require('mongoose');
const bcrypt = require('bcryptjs');

const userSchema = new Schema({
  name: {
    type: String,
    required: [true, 'Name is required'],
    trim: true,
  },
  email: {
    type: String,
    required: [true, 'Email is required'],
    unique: true,
    lowercase: true,
    trim: true,
  },
  password: {
    type: String,
    required: [true, 'Password is required'],
    minlength: [8, 'Password must be at least 8 characters'],
    select: false, // never return password in queries by default
  },
  role: {
    type: String,
    enum: ['customer', 'admin'],
    default: 'customer',
  },
}, { timestamps: true });

// hash password before saving
userSchema.pre('save', async function(next) {
  if (!this.isModified('password')) return next();
  this.password = await bcrypt.hash(this.password, 12);
  next();
});

// compare password for login
userSchema.methods.comparePassword = async function(candidate) {
  return bcrypt.compare(candidate, this.password);
};

module.exports = model('User', userSchema);
The select: false on the password field means Mongoose will not include the password in query results unless you explicitly ask for it with .select('+password'). This prevents you from accidentally sending password hashes to the client in a response.
Generating a token
Create a small utility function that wraps the jsonwebtoken library. This keeps your route handlers clean and gives you one place to change token settings later.
// utils/generateToken.js
const jwt = require('jsonwebtoken');

function generateToken(user) {
  return jwt.sign(
    {
      userId: user._id,
      role: user.role,
    },
    process.env.JWT_SECRET,
    {
      expiresIn: '24h',
    }
  );
}

module.exports = generateToken;
jwt.sign() takes three arguments: the payload (what data to put in the token), the secret key, and an options object. expiresIn accepts human-readable strings like '24h', '7d', or '30m'. The library converts this into an exp claim in the payload automatically.
Your .env file needs a JWT_SECRET:
MONGO_URI=mongodb://localhost:27017/myapp
JWT_SECRET=a-long-random-string-that-nobody-can-guess-not-this-one-though
Generate a proper random secret in your terminal:
node -e "console.log(require('crypto').randomBytes(64).toString('hex'))"
Use the output of that command. Not "mysecret", not "jwt123", not "password". A short or guessable secret defeats the entire purpose of signing tokens.
The signup route
// routes/auth.js
const express = require('express');
const router = express.Router();
const User = require('../models/User');
const generateToken = require('../utils/generateToken');

router.post('/signup', async (req, res) => {
  try {
    const { name, email, password } = req.body;

    // check if user already exists
    const existing = await User.findOne({ email });
    if (existing) {
      return res.status(409).json({ error: 'Email already registered' });
    }

    const user = await User.create({ name, email, password });
    const token = generateToken(user);

    res.status(201).json({
      token,
      user: {
        id: user._id,
        name: user.name,
        email: user.email,
        role: user.role,
      },
    });
  } catch (err) {
    res.status(400).json({ error: err.message });
  }
});
Notice the response does not include user.password. Because of select: false in the schema, the password hash is not on the user object returned by User.create(). But even if it were, the response explicitly picks which fields to send. Be deliberate about what goes over the wire.
The login route
router.post('/login', async (req, res) => {
  try {
    const { email, password } = req.body;

    // .select('+password') overrides select: false for this query
    const user = await User.findOne({ email }).select('+password');
    if (!user) {
      return res.status(401).json({ error: 'Invalid email or password' });
    }

    const isMatch = await user.comparePassword(password);
    if (!isMatch) {
      return res.status(401).json({ error: 'Invalid email or password' });
    }

    const token = generateToken(user);

    res.json({
      token,
      user: {
        id: user._id,
        name: user.name,
        email: user.email,
        role: user.role,
      },
    });
  } catch (err) {
    res.status(500).json({ error: 'Login failed' });
  }
});

module.exports = router;
One thing to notice: the error message is the same for "email not found" and "wrong password." This is intentional. If you say "email not found," an attacker knows that email is not in your system. If you say "wrong password," they know the email is valid and can focus on brute-forcing the password. Same generic message for both prevents that information leak.
Sending the token with requests
After login, the client gets a token back. On every subsequent request to a protected endpoint, the client needs to send that token. The standard way is through the Authorization header using the Bearer scheme:
Authorization: Bearer eyJhbGciOiJIUzI1NiIs...
If you are testing with curl:
curl http://localhost:3000/api/orders \
  -H "Authorization: Bearer YOUR_TOKEN_HERE"
If you are building a frontend with fetch:
const token = localStorage.getItem('token');

const response = await fetch('/api/orders', {
  headers: {
    'Authorization': `Bearer ${token}`,
    'Content-Type': 'application/json',
  },
});

const data = await response.json();
If you are using axios, you can set a default header so you do not have to add it to every request:
const axios = require('axios');

// set once after login
axios.defaults.headers.common['Authorization'] = `Bearer ${token}`;

// now every request includes the token automatically
const res = await axios.get('/api/orders');
The word Bearer before the token is a convention defined in RFC 6750. It tells the server "I am authenticating by bearing (carrying) this token." You will see this in almost every API that uses JWTs.
Protecting routes with middleware
This is the part where the authentication actually happens on the server side. You write a middleware function that runs before your route handler. It checks for the token, verifies it, and either lets the request through or rejects it.
// middleware/auth.js
const jwt = require('jsonwebtoken');
const User = require('../models/User');

async function authenticate(req, res, next) {
  // 1. get the token from the header
  const authHeader = req.headers.authorization;
  if (!authHeader || !authHeader.startsWith('Bearer ')) {
    return res.status(401).json({ error: 'No token provided' });
  }

  const token = authHeader.split(' ')[1];

  try {
    // 2. verify the token
    const decoded = jwt.verify(token, process.env.JWT_SECRET);

    // 3. check if the user still exists
    const user = await User.findById(decoded.userId);
    if (!user) {
      return res.status(401).json({ error: 'User no longer exists' });
    }

    // 4. attach user to the request object
    req.user = user;
    next();
  } catch (err) {
    if (err.name === 'TokenExpiredError') {
      return res.status(401).json({ error: 'Token expired' });
    }
    return res.status(401).json({ error: 'Invalid token' });
  }
}

module.exports = authenticate;
Walking through this line by line:
First, it checks if the Authorization header exists and starts with Bearer . If not, the request is rejected immediately. No token, no access.
Then it pulls the token out by splitting on the space and taking the second part (index 1). "Bearer eyJhb..." becomes "eyJhb...".
jwt.verify() does two things at once. It checks the signature to make sure the token was not tampered with, and it checks if the token has expired. If either check fails, it throws an error.
The User.findById(decoded.userId) step is optional but I recommend it. The token might be valid but the user could have been deleted from the database since the token was issued. Without this check, a deleted user's token would still work until it expires.
Finally, it attaches the user to req.user. This means any route handler that runs after the middleware can access req.user without doing another database lookup.

Using the middleware
Apply it to any route that needs protection:
// routes/orders.js
const express = require('express');
const router = express.Router();
const authenticate = require('../middleware/auth');

// public route, no auth needed
router.get('/menu', async (req, res) => {
  // anyone can see the menu
  const items = await MenuItem.find();
  res.json(items);
});

// protected route
router.get('/orders', authenticate, async (req, res) => {
  // req.user is available because authenticate middleware set it
  const orders = await Order.find({ user: req.user._id });
  res.json(orders);
});

// protected route
router.post('/orders', authenticate, async (req, res) => {
  const order = await Order.create({
    user: req.user._id,
    items: req.body.items,
    totalAmount: req.body.totalAmount,
  });
  res.status(201).json(order);
});
The pattern is simple: add authenticate as a second argument before the route handler. It runs first. If the token is valid, next() passes control to the route handler and req.user is populated. If not, the middleware sends a 401 response and the route handler never executes.
Role-based access control
Once you have authentication working, adding authorization is a small step. You already have req.user.role available. Write another middleware that checks it:
// middleware/authorize.js
function authorize(...allowedRoles) {
  return (req, res, next) => {
    if (!req.user) {
      return res.status(401).json({ error: 'Not authenticated' });
    }

    if (!allowedRoles.includes(req.user.role)) {
      return res.status(403).json({ error: 'Not authorized' });
    }

    next();
  };
}

module.exports = authorize;
Use it after authenticate:
const authenticate = require('../middleware/auth');
const authorize = require('../middleware/authorize');

// only admins can delete menu items
router.delete(
  '/menu/:id',
  authenticate,
  authorize('admin'),
  async (req, res) => {
    await MenuItem.findByIdAndDelete(req.params.id);
    res.json({ message: 'Deleted' });
  }
);

// both admins and riders can update order status
router.patch(
  '/orders/:id/status',
  authenticate,
  authorize('admin', 'rider'),
  async (req, res) => {
    const order = await Order.findByIdAndUpdate(
      req.params.id,
      { status: req.body.status },
      { new: true }
    );
    res.json(order);
  }
);
The 401 versus 403 distinction matters. 401 means "I do not know who you are" (not authenticated). 403 means "I know who you are, but you are not allowed to do this" (not authorized). Mixing them up makes debugging harder for the person consuming your API.
Token expiration and why it matters
I set expiresIn: '24h' in the token generation function. That means after 24 hours, the token stops working and the user has to log in again. This seems annoying, and it is, but it exists for a good reason.
JWTs cannot be invalidated individually. Once a token is issued, it is valid until it expires. There is no "log this token out" button on the server because the server does not track tokens. If someone steals a token, the attacker has access until that token expires. A short expiration limits the damage window.
The tradeoff is user experience. A 15-minute token means users log in constantly. A 7-day token means a stolen token is useful for a week. Most APIs pick something in the middle, like 1 to 24 hours, and use refresh tokens for longer sessions. Refresh tokens are a deeper topic that I will cover in a separate post, but the basic idea is: the short-lived access token handles regular requests, and a longer-lived refresh token lets the client get a new access token without the user re-entering their password.
For now, 24 hours is a reasonable default while you are learning. Adjust based on what your app needs.
Common mistakes I made (and how to avoid them)
Storing tokens in localStorage without thinking about it
localStorage is the easy option, and for many apps it is fine. But localStorage is accessible to any JavaScript running on your page. If your site has an XSS vulnerability (a script injection), an attacker can read the token from localStorage and send it to their own server.
The more secure option for browser apps is an httpOnly cookie, which JavaScript cannot access at all. The browser sends it automatically with every request. The tradeoff is that cookies require CORS configuration and are vulnerable to CSRF attacks instead, which you mitigate with CSRF tokens. There is no perfect answer. For a learning project, localStorage is fine. For a production app with real users, research httpOnly cookies.
Using a weak secret
I used "secret" as my JWT_SECRET during development. If an attacker knows or guesses your secret, they can create valid tokens for any user. Use the crypto.randomBytes command I showed earlier. Make it at least 64 characters.
Putting sensitive data in the payload
I put a user's email in the payload once, which was fine. Then I put their phone number in there, which was less fine. Then I considered putting their address in there and realized I was heading in a bad direction. The payload is readable by anyone. Only put identifiers and roles in there, not personal information.
Not handling expired tokens on the frontend
When a token expires, the server returns 401. If your frontend does not handle this, the user sees a broken page with no explanation. Add a response interceptor (if using axios) or a wrapper around fetch that checks for 401 responses and redirects to the login page:
axios.interceptors.response.use(
  (response) => response,
  (error) => {
    if (error.response && error.response.status === 401) {
      localStorage.removeItem('token');
      window.location.href = '/login';
    }
    return Promise.reject(error);
  }
);
Testing the whole flow
Here is how to test everything end to end using curl. You can also use Postman or Thunder Client in VS Code, but curl works anywhere.
# 1. Sign up
curl -X POST http://localhost:3000/api/auth/signup \
  -H "Content-Type: application/json" \
  -d '{"name": "Priya", "email": "priya@example.com", "password": "mypassword123"}'

# response:
# {
#   "token": "eyJhbGciOiJIUzI1NiIs...",
#   "user": { "id": "...", "name": "Priya", "email": "priya@example.com", "role": "customer" }
# }

# 2. Copy the token from the response and use it:
TOKEN="eyJhbGciOiJIUzI1NiIs..."

# 3. Access a protected route
curl http://localhost:3000/api/orders \
  -H "Authorization: Bearer $TOKEN"

# 4. Try without a token
curl http://localhost:3000/api/orders
# { "error": "No token provided" }

# 5. Try with a garbage token
curl http://localhost:3000/api/orders \
  -H "Authorization: Bearer this.is.fake"
# { "error": "Invalid token" }
The full project structure
project/
  .env
  server.js
  db.js
  models/
    User.js
  routes/
    auth.js
    orders.js
  middleware/
    auth.js
    authorize.js
  utils/
    generateToken.js
// server.js
require('dotenv').config();
const express = require('express');
const connectDB = require('./db');
const authRoutes = require('./routes/auth');
const orderRoutes = require('./routes/orders');

const app = express();
app.use(express.json());

connectDB();

app.use('/api/auth', authRoutes);
app.use('/api', orderRoutes);

const PORT = process.env.PORT || 3000;
app.listen(PORT, () => {
  console.log(`server running on port ${PORT}`);
});
// db.js
const mongoose = require('mongoose');

async function connectDB() {
  try {
    await mongoose.connect(process.env.MONGO_URI);
    console.log('connected to MongoDB');
  } catch (err) {
    console.error('connection failed:', err.message);
    process.exit(1);
  }
}

module.exports = connectDB;
What I wish someone had told me
JWTs are not a complete solution. They handle the "prove who you are on each request" part well, but they do not handle logout (you cannot invalidate a token without maintaining state), they do not handle "this user changed their password so all their existing tokens should stop working" (same problem), and they do not handle refresh flows without extra work. For a learning project or an API where short token lifetimes are acceptable, JWTs are great. For a complex app with real security requirements, you will eventually layer more on top.
The thing that actually made authentication click for me was building it once from scratch, messing it up, locking myself out, and then understanding each piece by fixing it. The login route is just comparing a password and creating a signed string. The middleware is just reading that string back and checking the signature. The protected route is just checking if the middleware said "this person is real" before running. None of it is magic. It is just strings and if statements and a bit of cryptography you do not have to understand deeply to use correctly.
Start with the code in this post, get it running, then try breaking it. Change the secret key after creating a token and see what happens. Remove the exp field and think about what that means. Send a request without the Bearer prefix. The errors you get will teach you more than reading about it ever could.
References
jsonwebtoken on npm - the library used throughout this post
jwt.io - paste a token here to decode and inspect it visually, also has a debugger
bcryptjs on npm - password hashing library
RFC 7519: JSON Web Token - the official JWT specification, dense but complete
RFC 6750: Bearer Token Usage - why the Authorization header uses the word "Bearer"
OWASP JWT Cheat Sheet - security best practices for JWTs in production
Mongoose documentation - for the User model and pre-save hooks
Express middleware guide - how middleware works in Express